How-To
How to install WordPress on localhost 2018

This article is about how you can install WordPress on localhost . Installing WordPress locally will be really handy when you are just started developing the website. So, after fully development of your site you can migrate the website to your hosting account. Developing your site in localhost will reduce the development time and easy to handle the content without wasting your data connection. This is also good way to try out WordPress if you are new to WordPress. As you can test WordPress completely free without paying for hosting services. And also this is grate way to try out different plugins and updates without making changes to the live site. So, lest take a look how you can install WordPress on your localhost.
Install XAMPP on your computer
So, as you know XAMPP is an Apache server that can be install on your computer it also comes with php, Maria Db, phpMyAdmin, Perl and etc. you can also use other Apache servers like WampServer for this. In this article we are using XAMPP. Follow these steps to setup XAMPP to install WordPress.
1. First download XAMPP from Apache. After downloading setup run the setup.

2. Then click ‘Yes’ on the prompt dialog to continue to the standard installation wizard.

3. Click ‘Next’ on the installation wizard to continue. Then select the what are the components that you want to install with XAMPP. Two main things that you want to select are MySQL and phpMyAdmin. If can also select other components that you want to install with XAMPP. after selecting the component click ‘next’.

4. Now select the folder you want to install XAMPP. It better to install it on the default location in ‘c:\xampp’. otherwise you might run in to problems while using it.

5. In the next dialog it asks whether r you want to install Bitnami. We don’t want that for WordPress installation just deselect it and click ‘next’.
6. Once you click ‘next’ on the final dialog the installation will begin. Installation will take few minutes to complete.

7. After finishing installation, you can launch the XAMPP control panel.
8. To start your Apache server and MYSQL database you have to start them through the XAMPP control panel.

9. After the status of these two modules turns green your server is all set to go. By navigating to http://localhost address on your web browsers You can test whether your Apache server is running on localhost.

Now we have successfully setup the apache server in your local computer. Setting up other servers like WampServer is pretty similar to above steps. Now you can move to next section to stat installing WordPress on your localhost.
Create database for WordPress
Before we start installing WordPress we need to create a database for WordPress first. You can easily create database for WordPress using phpMyAdmin.
To create database, go to the phpMyAdmin panel. By clicking on the admin button on the XAMPP control panel you can launch phpMyAdmin.

Then click on Databases at the phpMyAdmin panel.

Just enter a name for your database and click create if the following dialog to create the database. Remember this database name you will need it later. You don’t need to create database user since you can use the default database user account.

Install WordPress
Now you need to download the WordPress files. To download WordPress, go to wordpress.org and download the latest version of WordPress.

Then navigate to the XAMPP installation directory. Mine its ‘c:\xampp’. In that folder look for a folder called htdocs. This htdocs folder is the public resource folder of your server. This will be the folder where you store all the website you want to launch with XAMPP. Create a subfolder inside the htdocs and rename it to whatever you want. I rename this to ‘wpsite’. Now you can access this folder from your browser with web address http://localhost/wpsite.
Once you create the folder, extract the WordPress .zip file you downloaded from wordpress.org into it.

Now you visit http://localhost/wpsite through the web browser to launch the WordPress installer

Now its just a dimple installation wizard that you can follow. When the following dialog appears enter the name of the database you created earlier. then enter the username as root and leave the password field empty.

Then in the next step enter a username and a password for the WordPress dashboard.

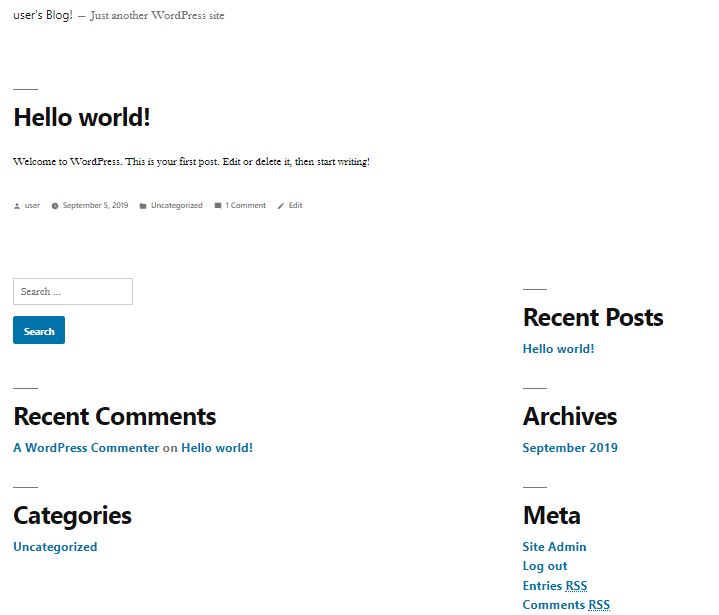
Once you finish this installation process, your WordPress site is all set. now if you check the web address http://localhost/wpsite you can see a WordPress site with default template is launched.

Now you can access the WordPress dashboard like in live site by navigating to http://localhost/wpsite/wp-admin. Use the username and password you defined in the installation process to login to the WordPress dashboard.

Checkout my following video tutorial on how to install WordPress in your localhost for more details.
[embedyt] https://www.youtube.com/watch?v=lLeCZsyzazk[/embedyt]
That s how you can install WordPress in your local host using XAMPP. If you have any questions please leave a comment. And don’t forget to share this article with your friends.
Google cloud platform is one of the best places to host your website and it’s totally free for the first year. If you are new to web hosting, I think this is the best place for you to start. There are lots of features in a google cloud platform, but here we discuss only free WordPress hosting on a google cloud platform. Let’s start.
What you need…
- Google account (Gmail)
- Valid credit card
Step 01 – Setup Google cloud platform
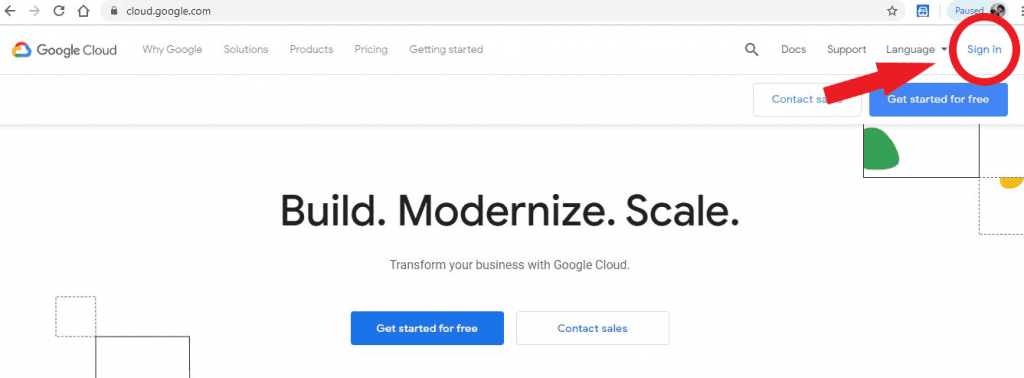
Go to cloud.google.com and sign in to it using your Gmail.
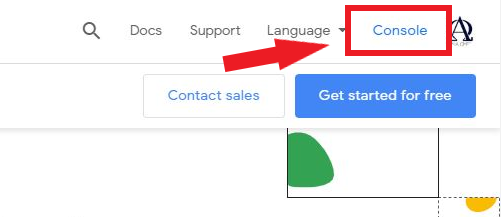
Then click on console and login to your google cloud console.
When you login, you will receive 300$ free credit to explore google cloud products for the first year. Maybe you would like to simply check out GCP’s breath, deploy some application of yours, learn about google cloud and machine learning capabilities. So you can use these 300$ credits to test all of them.
Then go ahead and activate the offer.
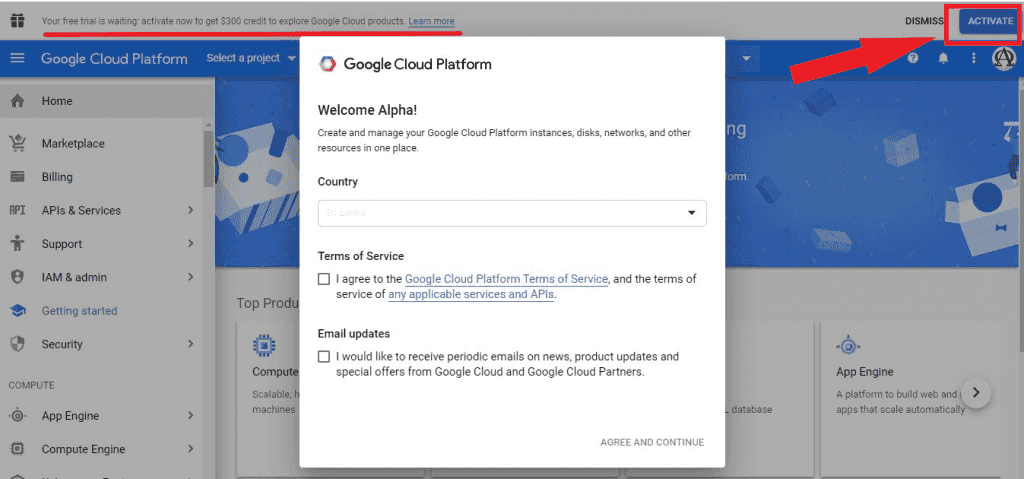
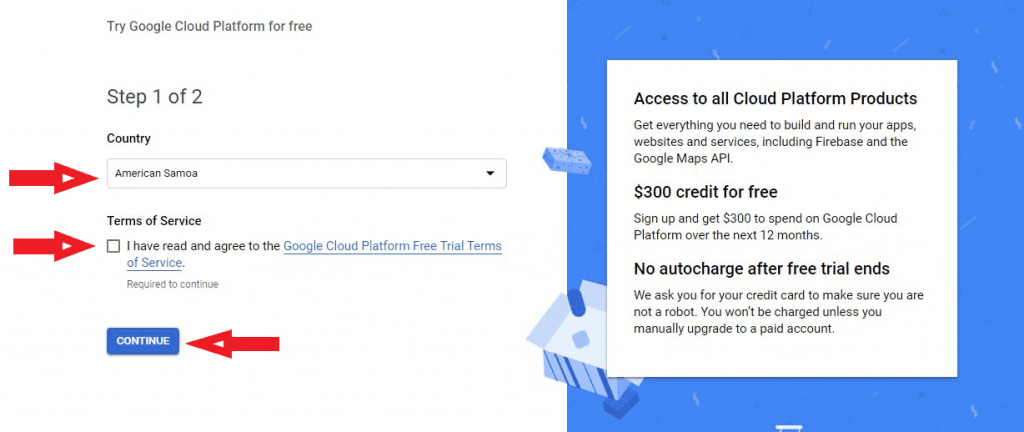
Select your country, agree to the term of service and then click continue
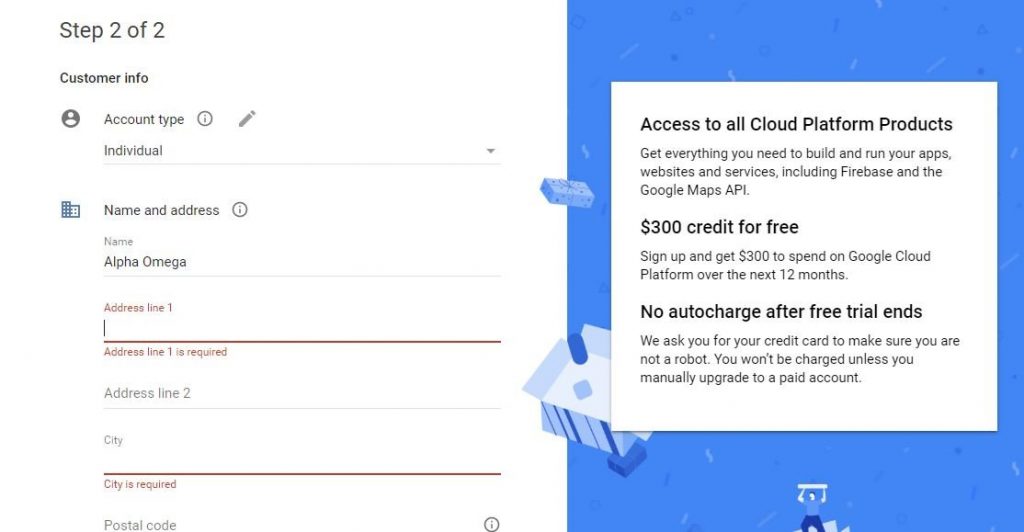
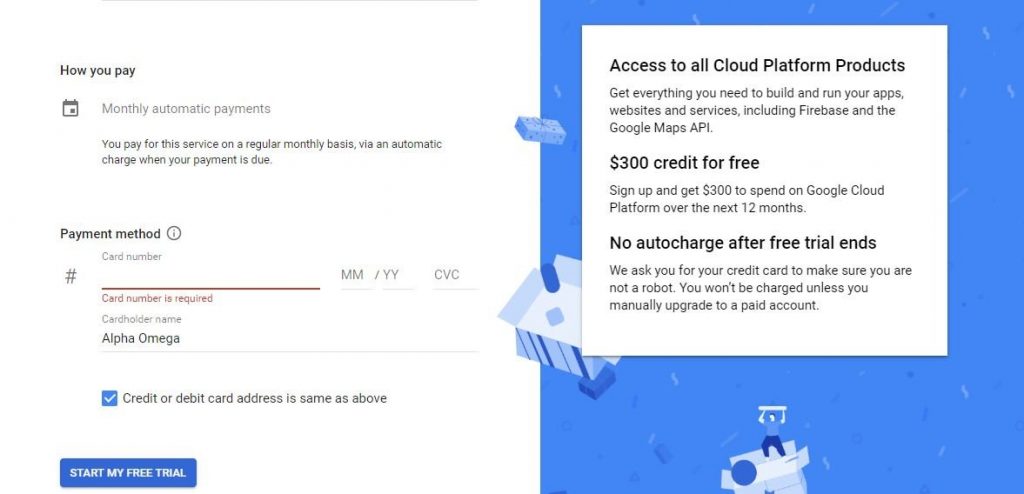
After that, set up your payment profile by giving your address and credit card details. Don’t afraid to give your card details because if you run out of credits you won’t be billed without your permission.
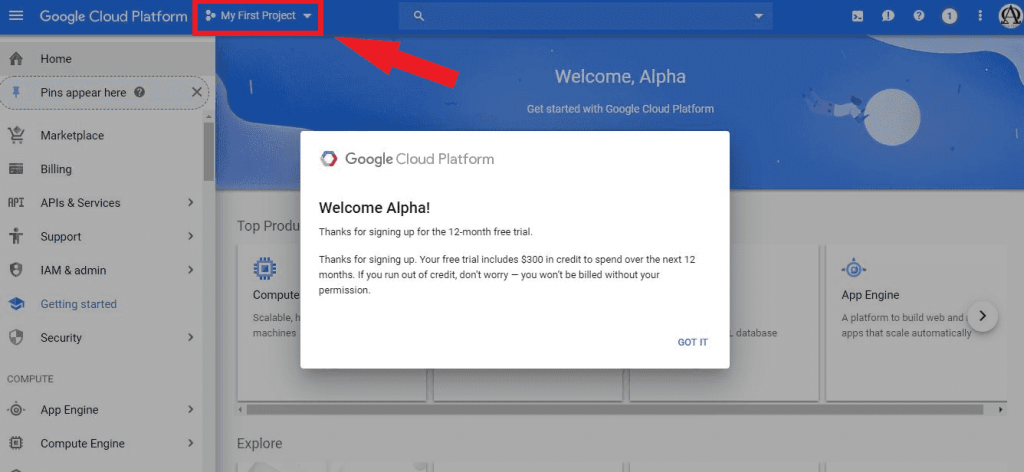
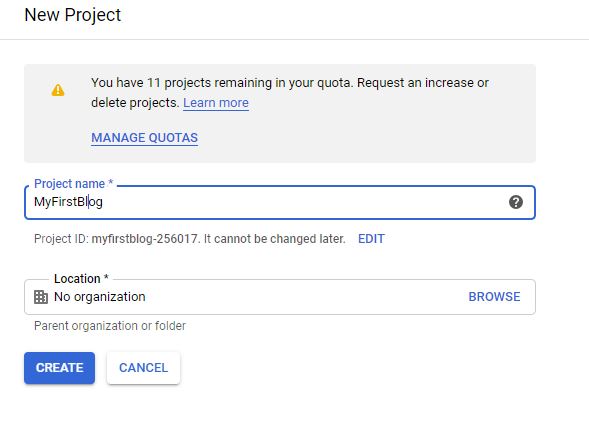
Congratulations …!! Now you are on the google cloud platform. This is a very simple dashboard and easy to understand for anyone. Lots of services are providing by this platform, but here we discuss only the hosting part. Go ahead and click on My First Project to create a new project.
Then create a new project by giving a suitable name.
Ok, now you have your google cloud project. Let’s see how to deploy WordPress on a google cloud platform.
Step 02 – Deploy WordPress on Google Cloud Platform
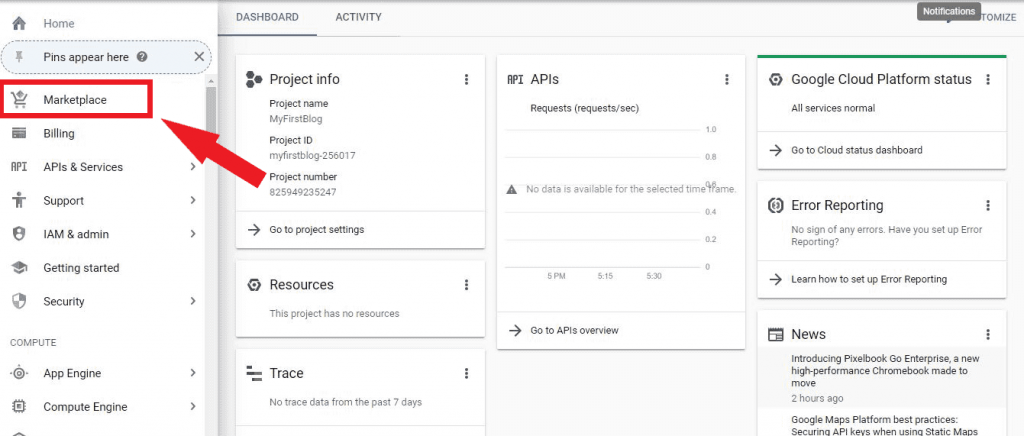
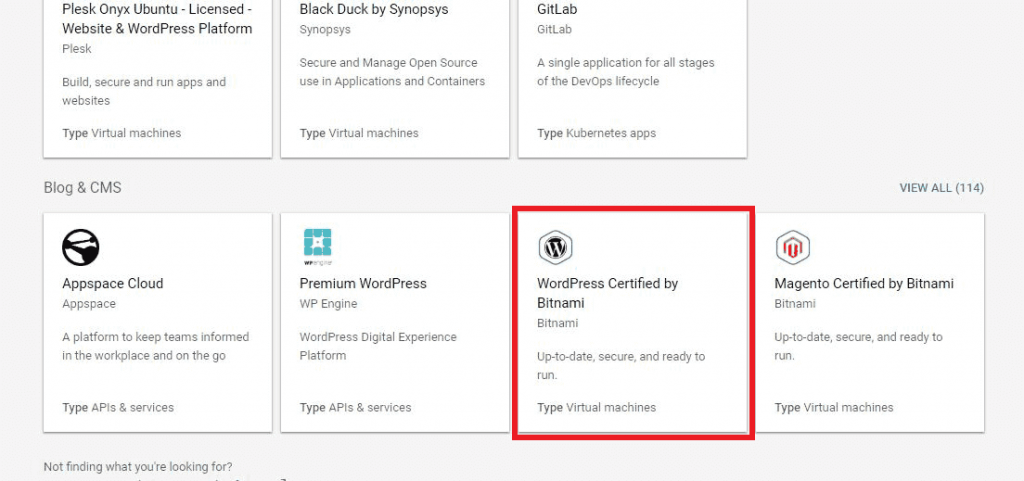
Go to Marketplace and scroll down to select WordPress Certified by Bitnami virtual machine
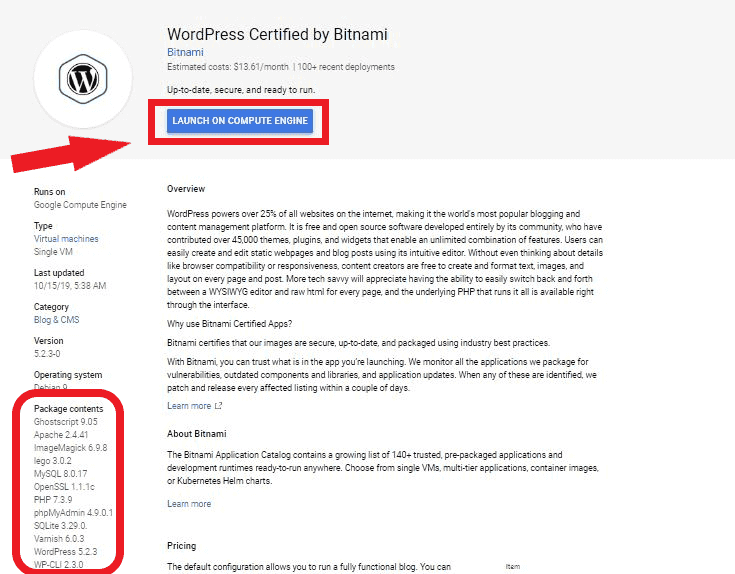
Bitnami WordPress comes with plenty of packages that are essential to typical WordPress themes. Let’s go ahead and click Launch on Compute Engine.
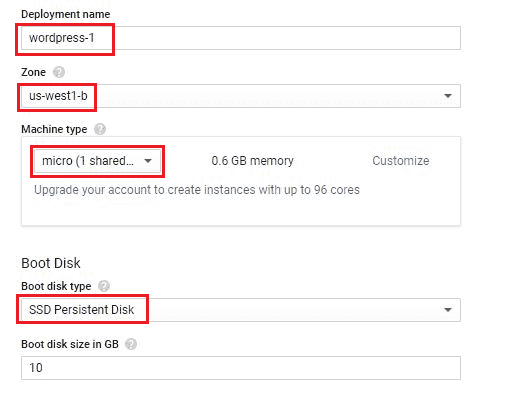
Ok, now we are going to set up deployment details. Please use the following values to fill in the details.
- Deployment Name – wordPress-1
- Zone – us-west1-b
- Machine Type – micro (1 shared vCPU)
- Boot disk type – SDD Persistent Disk
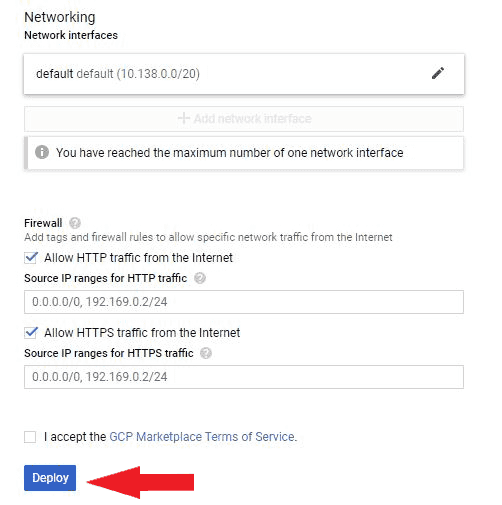
Keep default values for other fields and click the Deploy button.
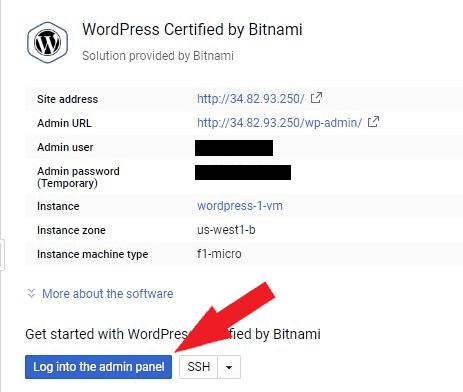
Now we have a new WordPress website. You can see the site IP address, user name, and admin password.
OK… what are you waiting for? Let’s log into the admin panel.
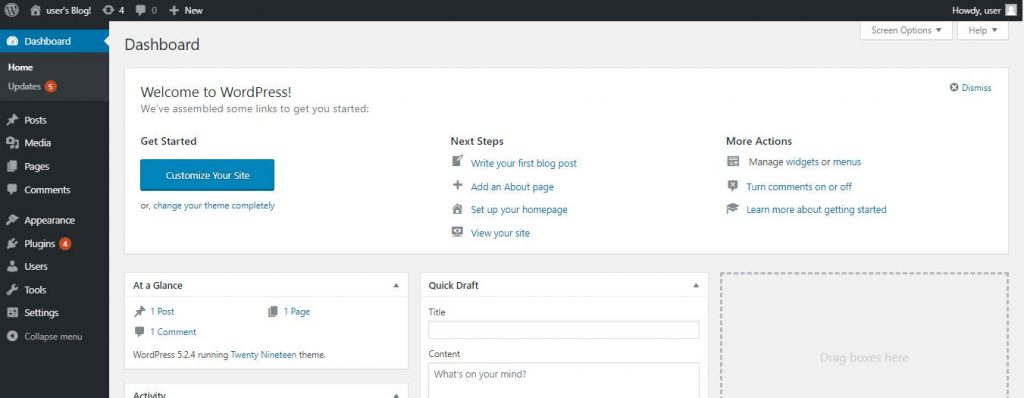
This is your WordPress admin panel. In addition, we hope to discuss WordPress customization in the future. For now, you can simply go through the dashboard and understand.
Finally, this is your brand new website. Using very few steps we launch our very first WordPress website. In future lessons, we hope to discuss WordPress customization and the best WordPress themes for blogging.
Hope you learn something, So don’t wait and start your blog today.
And don’t forget to share your experience with the Google cloud platform in the comment section.

10 Essential WordPress Plugins for your Blog

Free WordPress Hosting On Google Cloud Platform


