How-To
How to add PayPal donate button to your website or blog

In this article I am going to show you how to add PayPal donate button to your website or blog. Most of the bloggers make money from the blogs though donations. If you’re doing great job with your blog but you are not making enough money through the ads in your website, allowing people to donate to your work is the best way to make some extra cash from your blog. Similar to donation buttons there are PayPal buy now buttons that you can use to let you sell stuff in your blog. This PayPal buttons can be used in WordPress websites or any other HTML based websites. In this article I will show you how you can add PayPal donate button to your website or blog easily.
There are mainly two ways that this can be done. First one is adding the donate button to your WordPress or Html 5 website manually through html code and other method is adding the donate button through WordPress plugin. You can use either way according to your need and preferences.
First you need to have a PayPal business account. If you don’t have a PayPal business account sign up for a PayPal business account first.
Use this link to get a PayPal business account- PayPal business Account

Then login to your PayPal business account. After logging in to your PayPal business account, click on tools option. Under to types of tools you have click on PayPal button option to continue.

Then click on create new button under related items in tools options.

Then you will be directed to the button creation page. Now you can select the type of button you want if you want a donation button select donations under the button type section. There are some other types as well like buy now buttons, you can use buy now buttons to sell some products in your website. If you want to enable customers to you specific amount to access some download section you can use buy now button. With this buy now button you can create simple store web site easily.

After selecting the type of button you want, select the type of currency and what amount you want the donor to donate. If you are creating a buy now button you can set the download page or the download link for the product you are selling. Then just simply click create button to generate a PayPal button with your customizations. Copy this link to notepad or some text editor.

Then go to your website and where you want to place the PayPal button then enter this code to add the button to your web page.. For the image tag you can use the PayPal default image or any custom image you have. This code can also be place in WordPress websites as well. Just pace this code in WordPress article on text editor mode.
You can also use the WordPress plugin to easily add PayPal donation buttons to your WordPress website easily. There are plenty of plugins available to add donation buttons.
Add PayPal button in WordPress using PayPal donation plugin
You can use any of the free plugins available for papal donation. These are few of the available WordPress plugins.

Now login to your WordPress admin area and go to add new plugin in your WordPress dashboard. Then search for the specific plugin and install the plugin.
After activating the plugin, go to setting and click on PayPal donations to setup the plugin settings. First you need enter the PayPal account email address. If you don’t have a PayPal account, first creates a PayPal account. Then enter the email address of your PayPal account in this section.

Here you can also add return page URL like a thank you page for the donor. Or you can redirect the customer to a specific download page where he or she can download the content they purchased, for example eBook. You can add fixed amount to pay or you can give visitor the freedom of selecting the amount they want to pay. After finishing setting up the configurations just save setting to continue.

Now want you want to add the PayPal donation button to your article just enter the donation short code in the WordPress visual editor. Then it will be displayed in your article when you publish it. You can also add PayPal donation button to your side bar or footer as widget. To add widgets, go to your appearance-> widget and add PayPal donations widget to the place you want.
This is how you can add PayPal donation button to your website or blog. If you have any questions please leave a comment. If you like this article subscribe to our YouTube channel for more tutorials like this. You can also fine us on Facebook, Google plus and twitter.

Google cloud platform is one of the best places to host your website and it’s totally free for the first year. If you are new to web hosting, I think this is the best place for you to start. There are lots of features in a google cloud platform, but here we discuss only free WordPress hosting on a google cloud platform. Let’s start.
What you need…
- Google account (Gmail)
- Valid credit card
Step 01 – Setup Google cloud platform
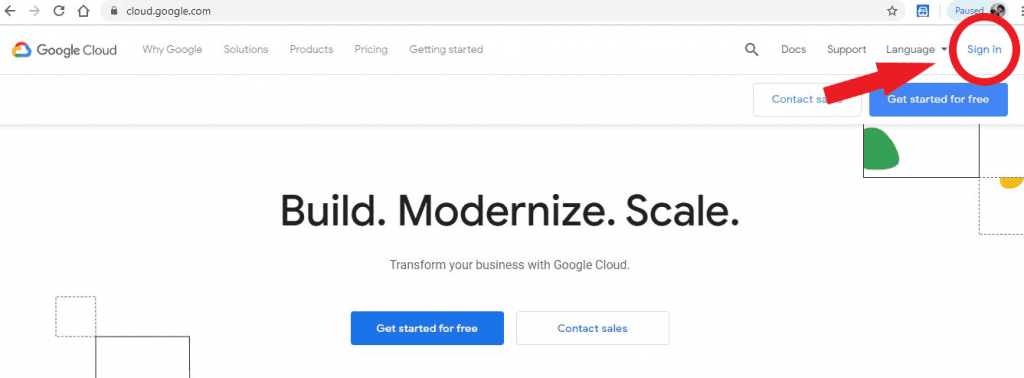
Go to cloud.google.com and sign in to it using your Gmail.
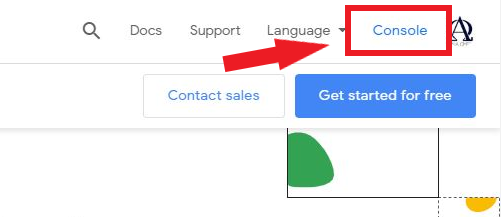
Then click on console and login to your google cloud console.
When you login, you will receive 300$ free credit to explore google cloud products for the first year. Maybe you would like to simply check out GCP’s breath, deploy some application of yours, learn about google cloud and machine learning capabilities. So you can use these 300$ credits to test all of them.
Then go ahead and activate the offer.
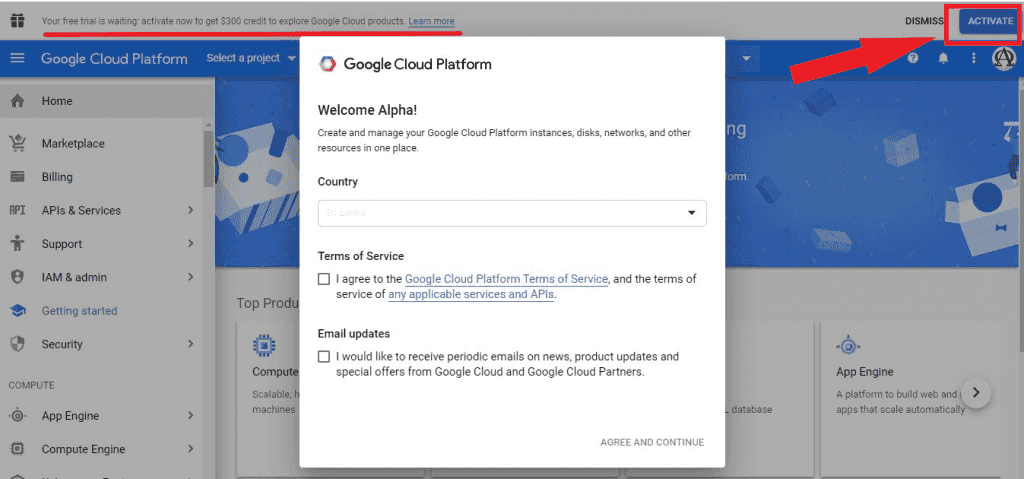
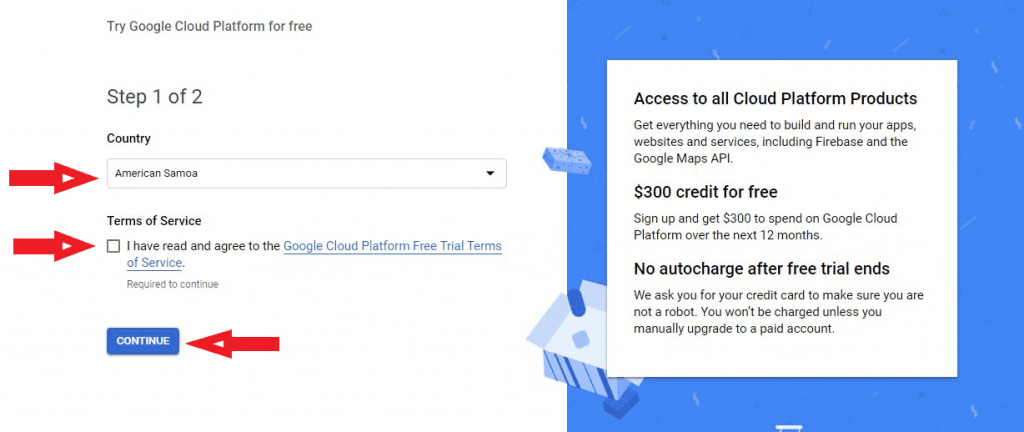
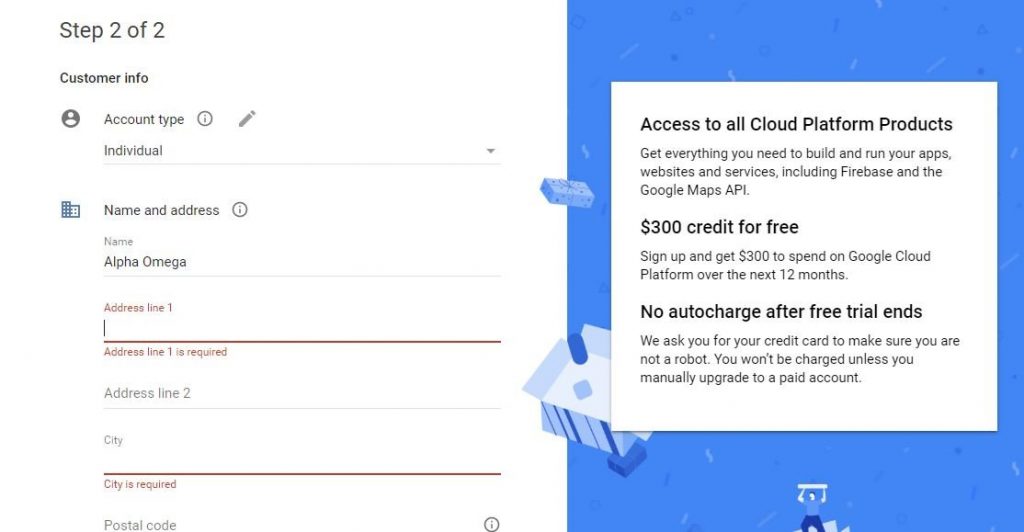
Select your country, agree to the term of service and then click continue
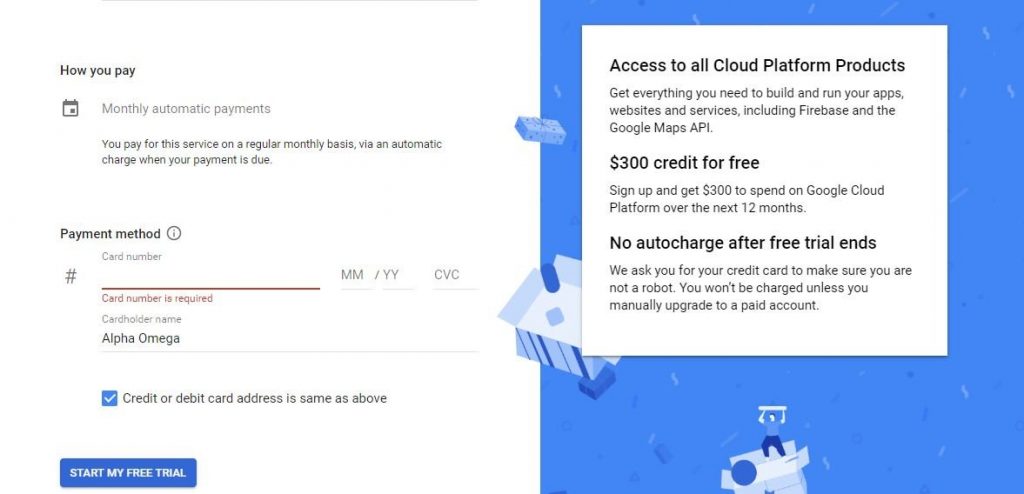
After that, set up your payment profile by giving your address and credit card details. Don’t afraid to give your card details because if you run out of credits you won’t be billed without your permission.
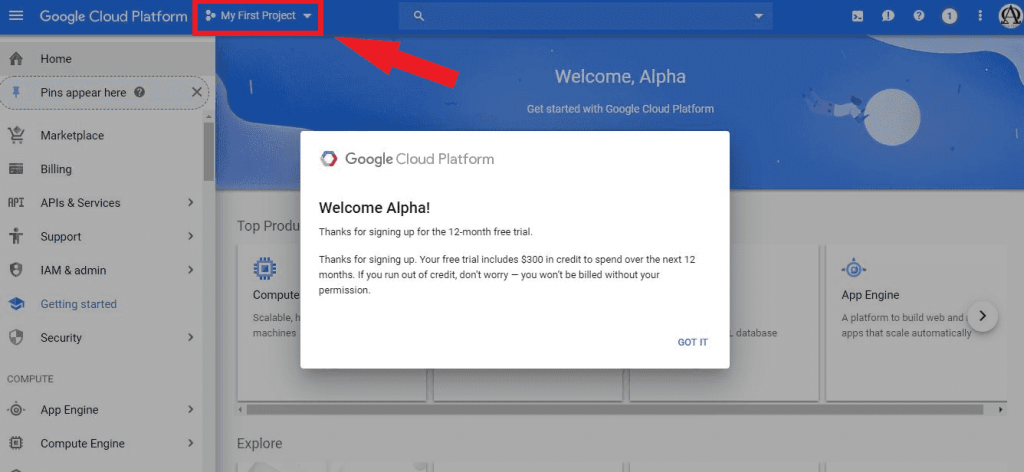
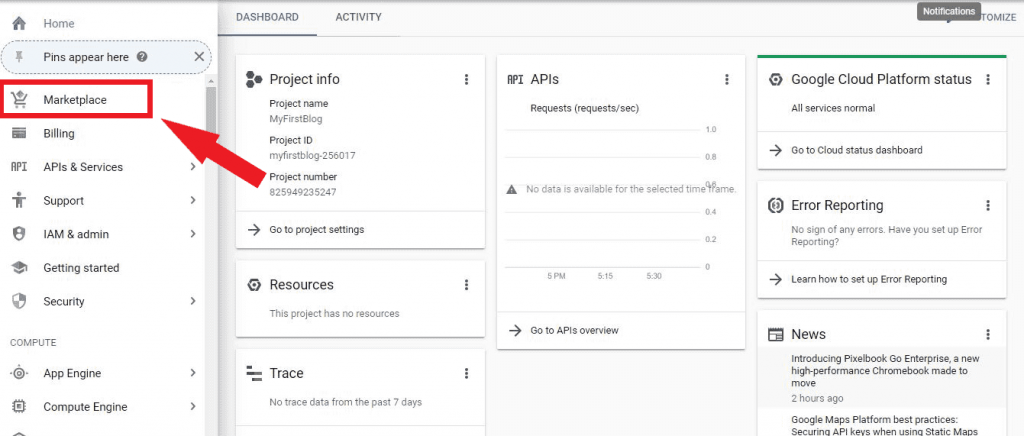
Congratulations …!! Now you are on the google cloud platform. This is a very simple dashboard and easy to understand for anyone. Lots of services are providing by this platform, but here we discuss only the hosting part. Go ahead and click on My First Project to create a new project.
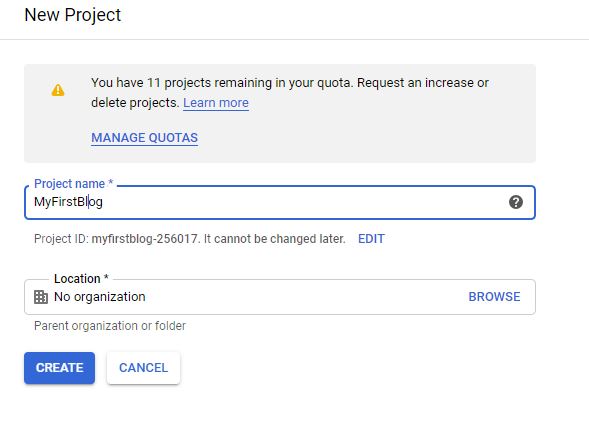
Then create a new project by giving a suitable name.
Ok, now you have your google cloud project. Let’s see how to deploy WordPress on a google cloud platform.
Step 02 – Deploy WordPress on Google Cloud Platform
Go to Marketplace and scroll down to select WordPress Certified by Bitnami virtual machine
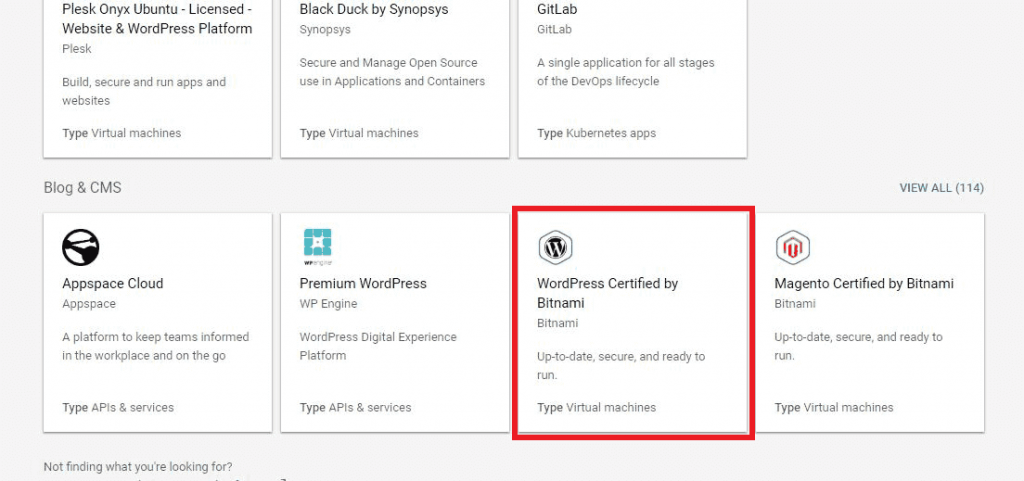
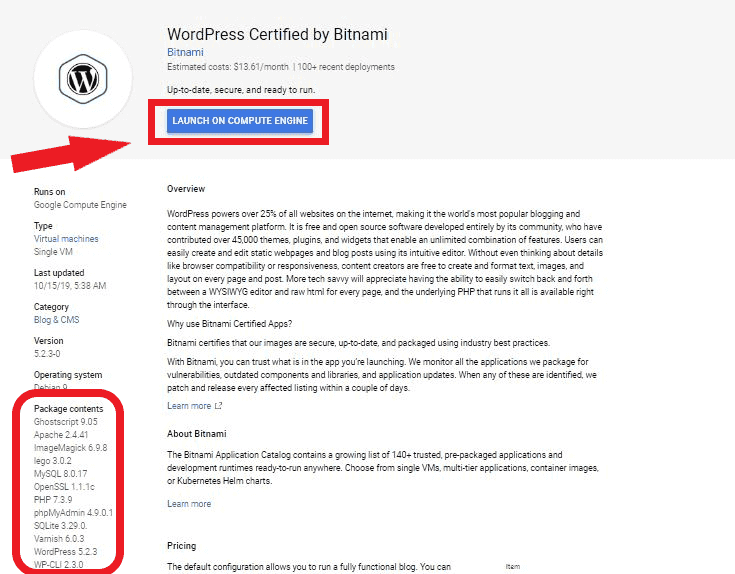
Bitnami WordPress comes with plenty of packages that are essential to typical WordPress themes. Let’s go ahead and click Launch on Compute Engine.
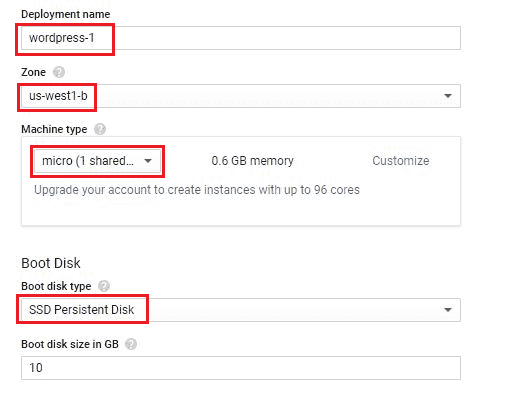
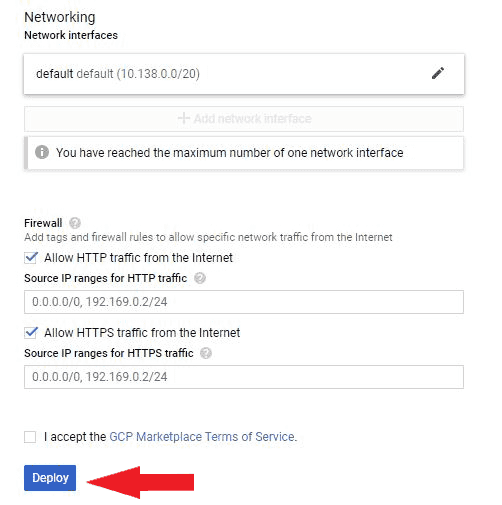
Ok, now we are going to set up deployment details. Please use the following values to fill in the details.
- Deployment Name – wordPress-1
- Zone – us-west1-b
- Machine Type – micro (1 shared vCPU)
- Boot disk type – SDD Persistent Disk
Keep default values for other fields and click the Deploy button.
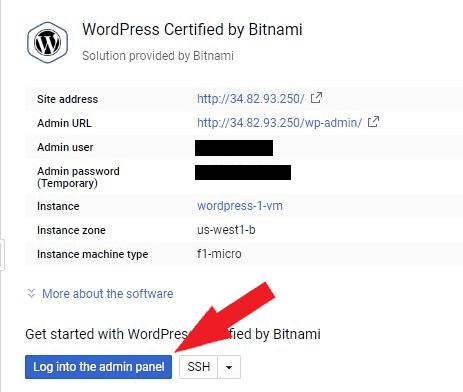
Now we have a new WordPress website. You can see the site IP address, user name, and admin password.
OK… what are you waiting for? Let’s log into the admin panel.
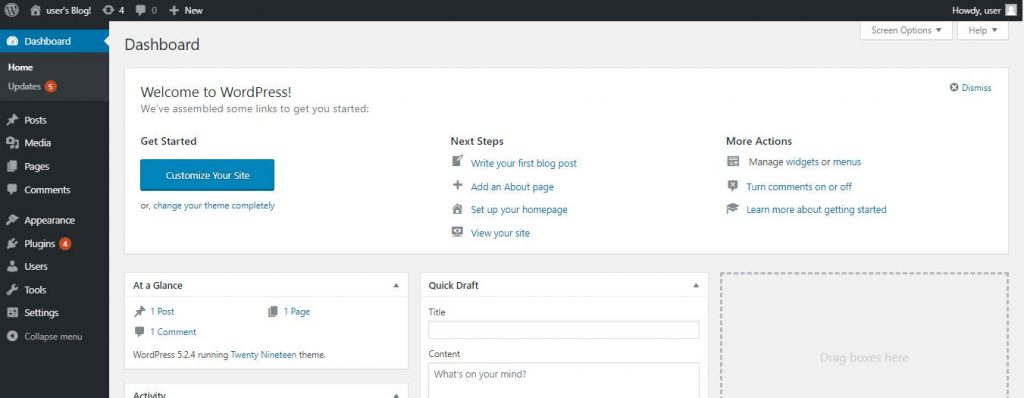
This is your WordPress admin panel. In addition, we hope to discuss WordPress customization in the future. For now, you can simply go through the dashboard and understand.
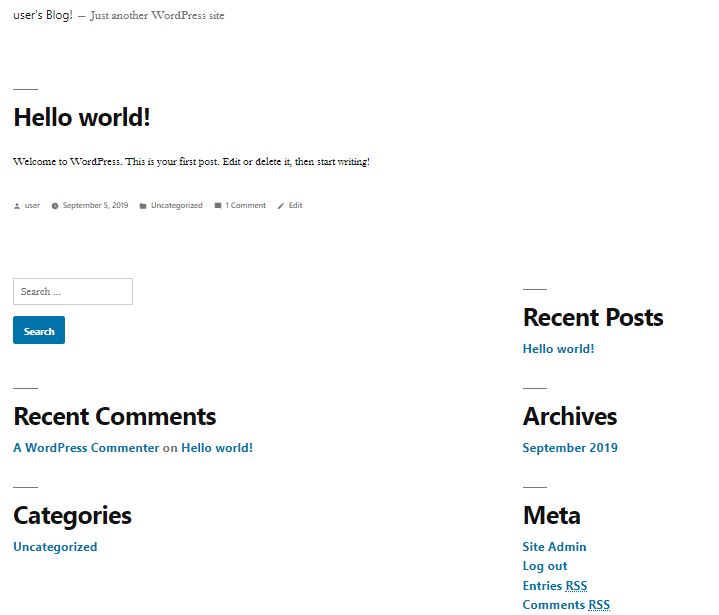
Finally, this is your brand new website. Using very few steps we launch our very first WordPress website. In future lessons, we hope to discuss WordPress customization and the best WordPress themes for blogging.
Hope you learn something, So don’t wait and start your blog today.
And don’t forget to share your experience with the Google cloud platform in the comment section.

10 Essential WordPress Plugins for your Blog

Free WordPress Hosting On Google Cloud Platform


Http://Gilessociety.Org/
March 12, 2021 at 11:53 pm
We are a group of volunteers and starting a new scheme
in our community. Your site provided us with valuable info to work on. You have
done a formidable job and our whole community will be thankful to you.