How-To
How to use backup and restore tools in windows 10
In this article we are going to discuss on how to use backup and restore tools in windows 10. Windows 10 has few options to backup files and settings on your computer. We will show you some of those easy methods to backup and recovery your files.
There are plenty of reasons why you should backup your files and data. being a windows user for many years I have of reasons myself. You can never say when you will run in to a problem. As a programmer I use lots of really performance consuming software’s like visual studio, android studio and unreal engine like software’s. Earlier when my system starts to get slowed down due to malware and other registry issues I used to copy all the data to an external hard and reinstall windows then reinstalling all the software’s. this is really time consuming and difficult to setup computer all setting and data like it was before. Creating backup is a really great way to overcome such problems. Data backups allow you to save your important files in separate storage device or separate network location. So, your data will be safe in a unexpected situation like data deletion, corruption or device failures.
Backup and restore tool (windows 7)
Microsoft has included windows 7 backup and restore tool in windows 10 its also available in windows 8 also (removed from windows 8.1). this is a great tool for backup and restore your files and settings. Using this tool, you can backup your entire hard drive if you want. So, let’s get started.
Setup backup using backup and restore tool
First go to search bar and search for “backup and restore”. Then select the backup and restore tool (windows 7) from the search results. If you can not find it that way. Just go to control panel. Then select backup and restore tool (windows 7) in control panel.

Then in the backup and restore panel. Click on setup backup button in order to create a new backup.

In the next dialog, you have to select where you want to save your backup. You have option to select current hard drive location, external storage or network location for backup to be crated. After selecting storage location click next.

In the next dialog you have two options let windows choose or select by your self what to backup. First option will backup files in desktop, libraries and default windows folders. Its better to select the second option since you can manually select files that you need. If you create the backup with the first option you don’t have option to select specific folders to restore, instead it will restore the entire drive ‘c’ loosing every file you added to the drive ‘c’ after backup image is create when restoring using that image.

Now, select the folders that you want to backup through this dialog.

In this dialog you will give an overview of what will be included in the backup image. Here you also have the option of scheduling backup. By setting a scheduled backup your files will be auto backed up weekly or daily at the scheduled time.

After setting everything just select ‘save settings and run backup’. Then the backup image will be created at the selected storage location. You can use this image to restore data.
Restoring or recovering Data from a backup Image
Now let’s see how you can restore files from the backup image. To do that first go back to the backup and restore main menu in control panel.

Then click the restore my files button to start restoring files.

Now simply browse and select the file you want to restore, then click the add files button. Then click next. In the next dialog you have the option of restoring file to its original location or restore it to an alternative location. This is important if you don’t want the current files in the existing location to be deleted when restoring the files.
Then click next to start restore files. Then your files and folders will be restored to way they were when you created the backup. That’s it. If you have any questions please leave a comment below.
Using System Restore
Next tool you have in windows 10 to create backup is that system restore feature. System restore allows you to create restore points. These restore points are like complete mirror image of your current system that saved in an external location. When your system run in to a problem you can use this restore point to restore your entire system to way it was at the time you set the restore point. Restore point record all the system information such as program files, device drivers and registry files. So, if you run in to any registry issue or windows file corrupted issue you can use restore points to recover that data.
Note that the programs and drivers that you have installed after setting that restore point will be uninstalled from your system when you restore. And other programs and drivers will be there just like when you created the restore point. So, it is recommended to set restore point just before a major software install or any other major change. You can also schedule to create restore point at a specific day of the week .so, you don’t have to create restore points manually all the time.
Create restore point
1.First go to the start menu and search for “restore point”. then select the create restore point option from the search results

2. In this System Properties dialog. Go to the System Protection tab. Here under protection setting there is list of drives that have protection enabled. Only these protection enabled drives will be stored in the restore point. So, enable protect on all the drives you want to set the restore point. To enable protection, click on the drive and select configure button. In the next dialog select turn on system protection to enable protection for that drive.

3. Then click the “Create” button to start creating the restore point.

4. In this dialog enter a description for the restore point and click create to start the process.

Restore your system with restore point
1. Type “restore” on your search tab and Go to the system properties window by clicking on “Create a restore point.” Then click on the “system restore” button.

2. In System Restore wizard click “Next”. Then you need to select the restore point that you want restore your system. The list contains all the restore point that were created by window automatically and ones that you created manually. After selecting the correct restore point click “next”.

3. Then click finish to start the restoring process.

- Now the restore process will start and your systems programs and files will be restored to way it was when that restore point was created. Restoration process will take about 20 minutes to complete. This time may vary according to the number of files and programs that you have in your system. Windows will automatically create a restore point just before the system get restored. Do, you can always undo theses changes using that restore point.
[embedyt] https://www.youtube.com/watch?v=cPcB4dlOTj8[/embedyt]
Using this backup and restore tools in windows 10 you can secure your data in your hard drive. and easily recover them in any accident or failures. If you have any question please leave a comment. and don’t forget to checkout my YouTube channel.

Google cloud platform is one of the best places to host your website and it’s totally free for the first year. If you are new to web hosting, I think this is the best place for you to start. There are lots of features in a google cloud platform, but here we discuss only free WordPress hosting on a google cloud platform. Let’s start.
What you need…
- Google account (Gmail)
- Valid credit card
Step 01 – Setup Google cloud platform
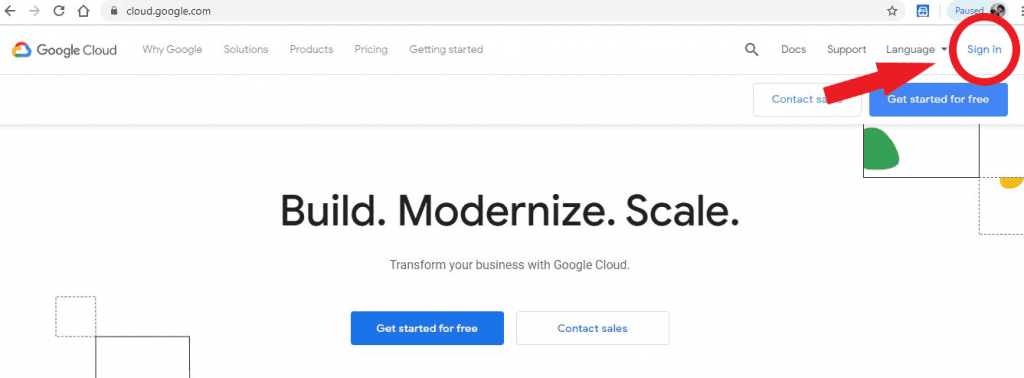
Go to cloud.google.com and sign in to it using your Gmail.
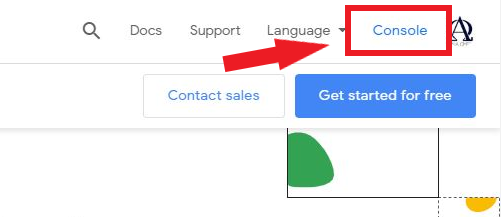
Then click on console and login to your google cloud console.
When you login, you will receive 300$ free credit to explore google cloud products for the first year. Maybe you would like to simply check out GCP’s breath, deploy some application of yours, learn about google cloud and machine learning capabilities. So you can use these 300$ credits to test all of them.
Then go ahead and activate the offer.
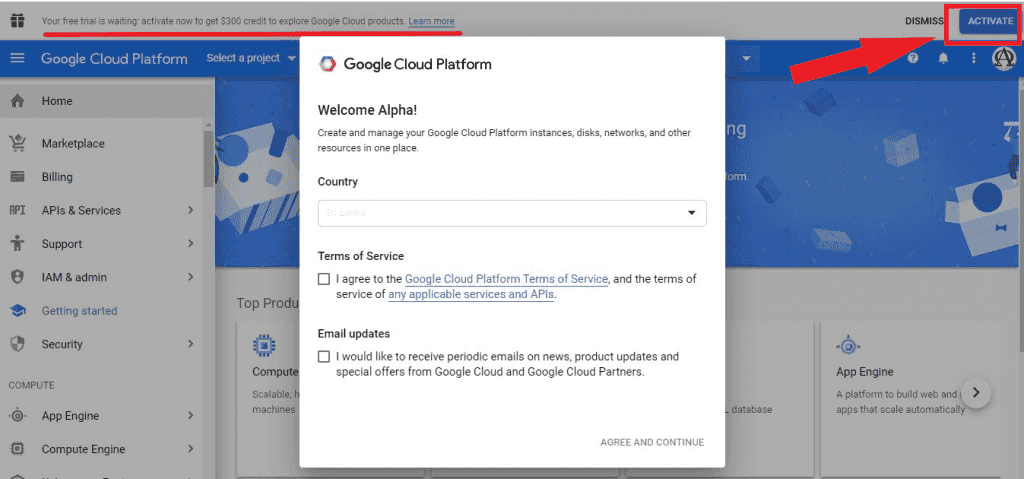
Select your country, agree to the term of service and then click continue
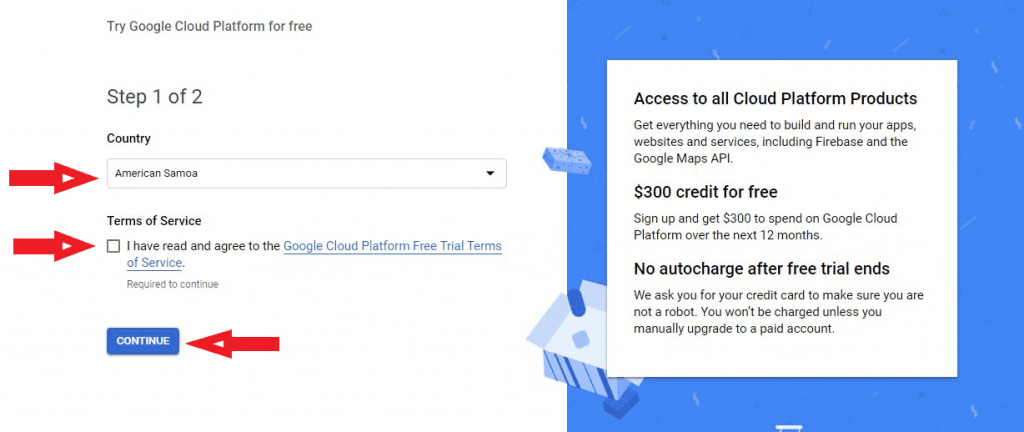
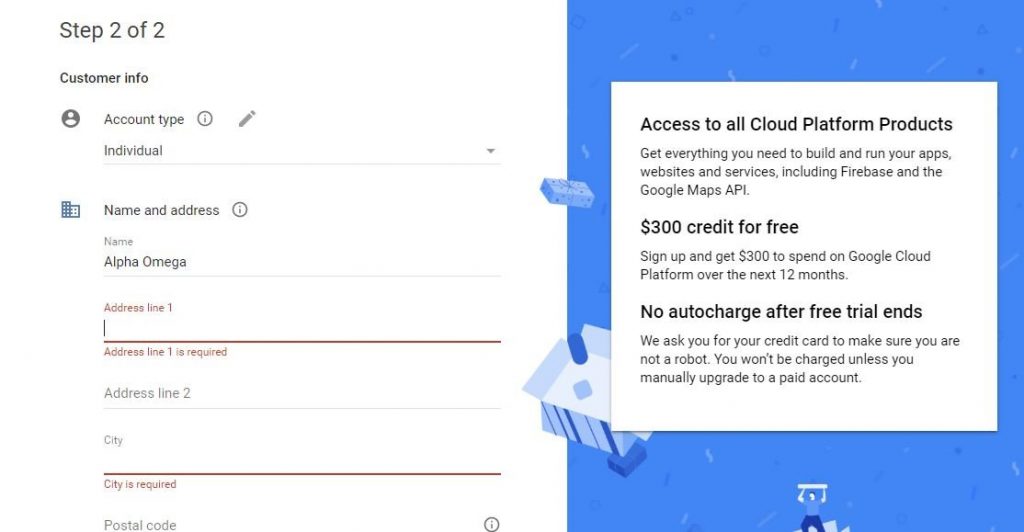
After that, set up your payment profile by giving your address and credit card details. Don’t afraid to give your card details because if you run out of credits you won’t be billed without your permission.

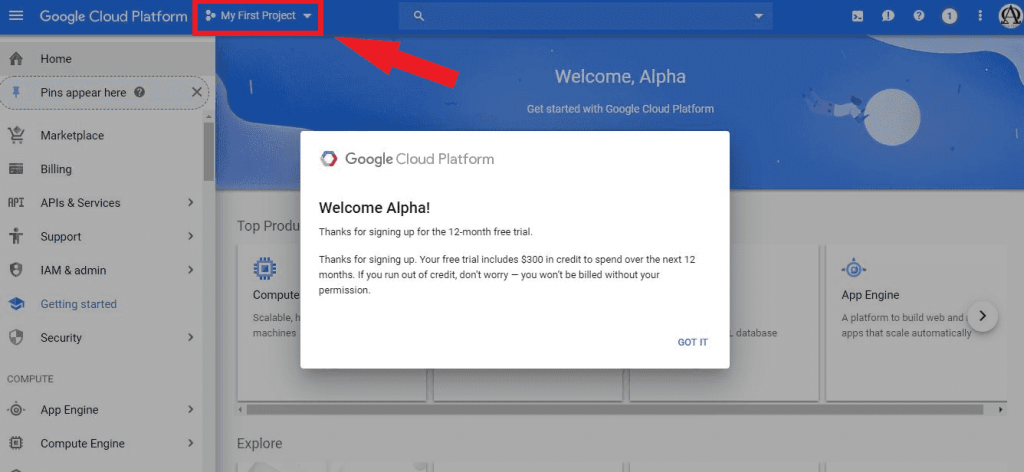
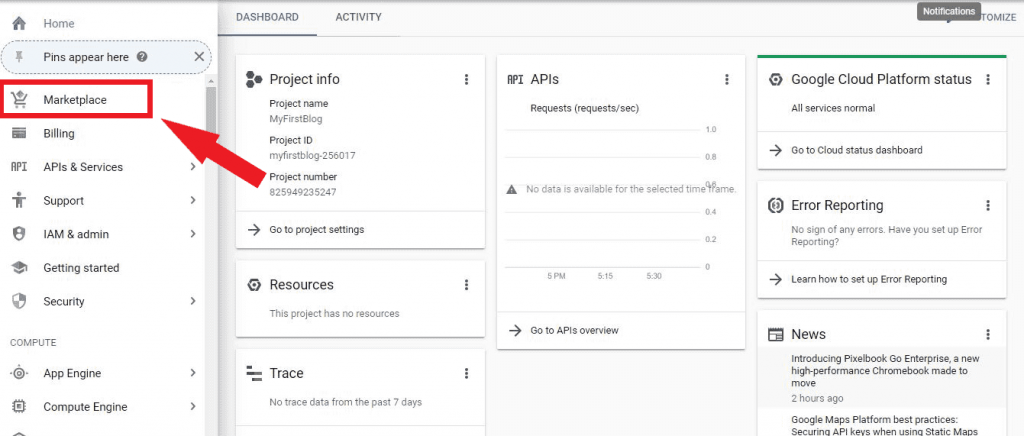
Congratulations …!! Now you are on the google cloud platform. This is a very simple dashboard and easy to understand for anyone. Lots of services are providing by this platform, but here we discuss only the hosting part. Go ahead and click on My First Project to create a new project.
Then create a new project by giving a suitable name.
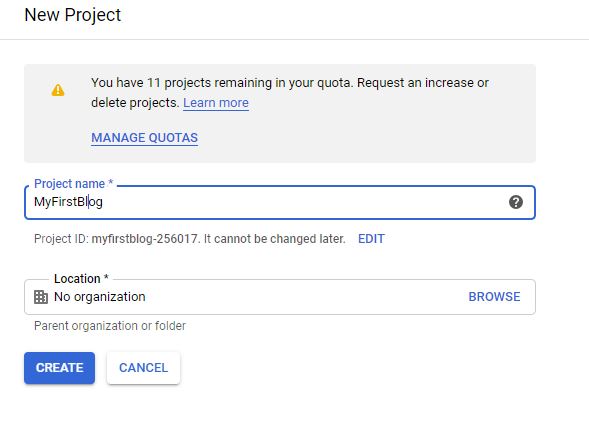
Ok, now you have your google cloud project. Let’s see how to deploy WordPress on a google cloud platform.
Step 02 – Deploy WordPress on Google Cloud Platform
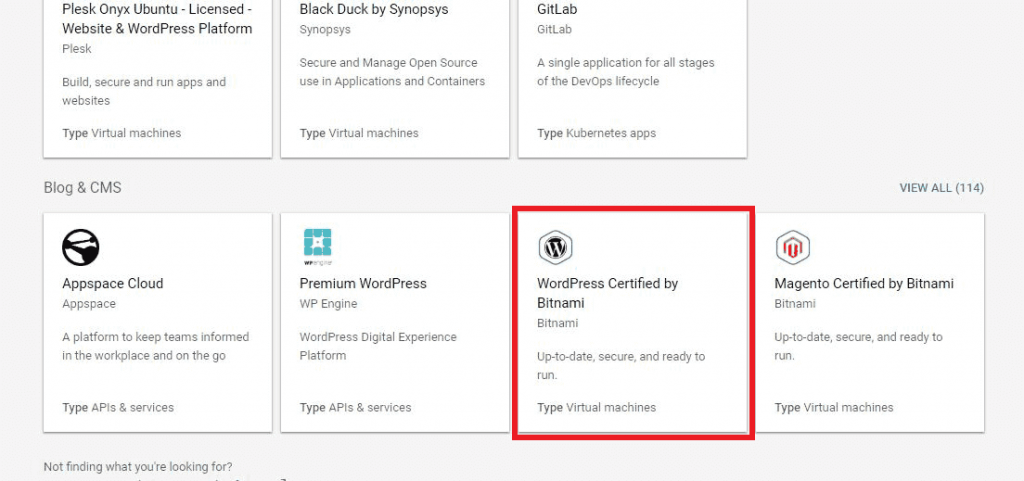
Go to Marketplace and scroll down to select WordPress Certified by Bitnami virtual machine
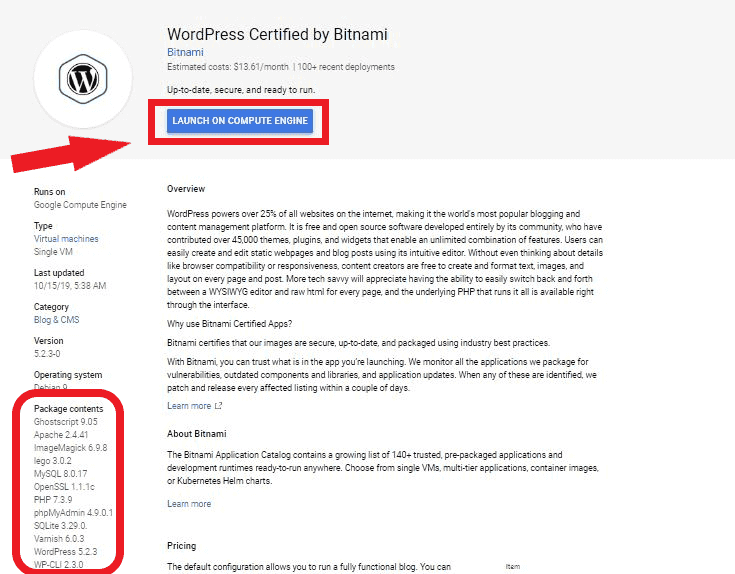
Bitnami WordPress comes with plenty of packages that are essential to typical WordPress themes. Let’s go ahead and click Launch on Compute Engine.
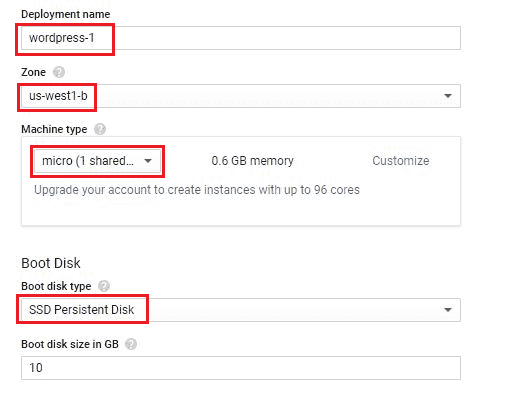
Ok, now we are going to set up deployment details. Please use the following values to fill in the details.
- Deployment Name – wordPress-1
- Zone – us-west1-b
- Machine Type – micro (1 shared vCPU)
- Boot disk type – SDD Persistent Disk
Keep default values for other fields and click the Deploy button.
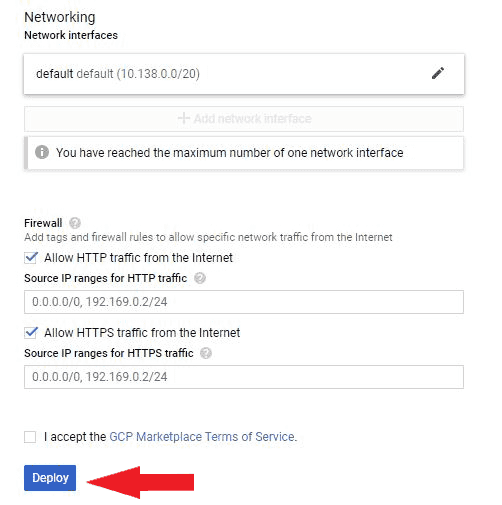
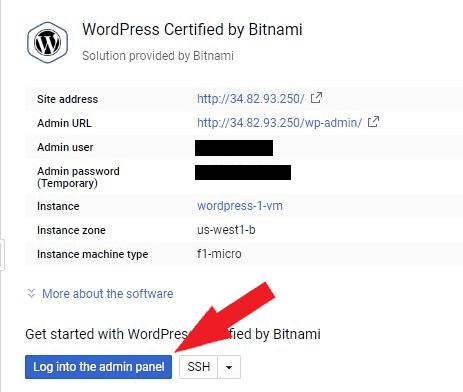
Now we have a new WordPress website. You can see the site IP address, user name, and admin password.
OK… what are you waiting for? Let’s log into the admin panel.
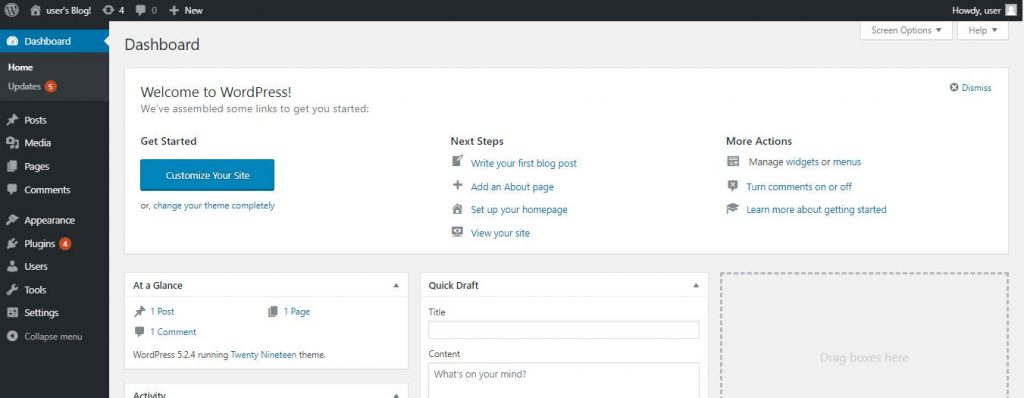
This is your WordPress admin panel. In addition, we hope to discuss WordPress customization in the future. For now, you can simply go through the dashboard and understand.
Finally, this is your brand new website. Using very few steps we launch our very first WordPress website. In future lessons, we hope to discuss WordPress customization and the best WordPress themes for blogging.
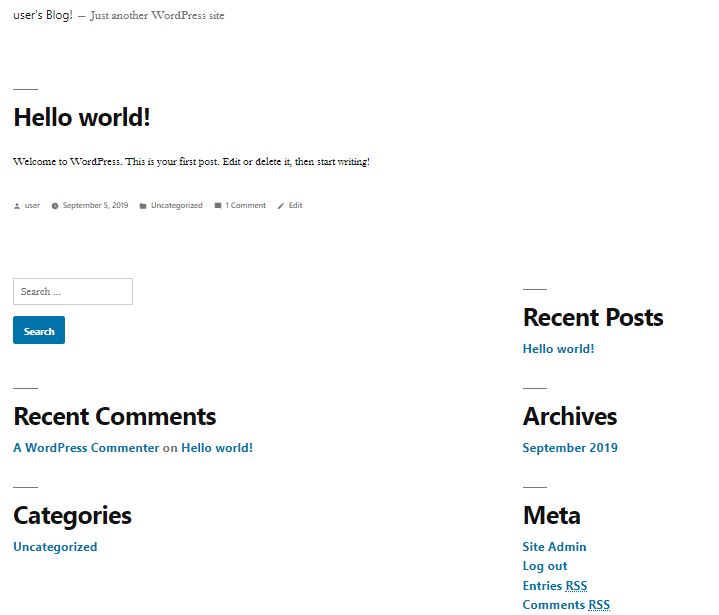
Hope you learn something, So don’t wait and start your blog today.
And don’t forget to share your experience with the Google cloud platform in the comment section.

10 Essential WordPress Plugins for your Blog

Free WordPress Hosting On Google Cloud Platform


